Authentication settings
To adapt general system authentication settings, navigate to Administration -> Authentication and choose -> Settings.
You can adapt the following under the authentication settings:
General authentication settings
Select if the authentication is required to access Nepenthes. For versions 13.1 and higher of Nepenthes, this setting will be checked by default
Important note: If you un-tick this box your Nepenthes instance will be visible to the general public without logging in. The visibility of individual projects depends on this setting.
Select an option for self-registration. Self-registration can either be disabled, or it can be allowed with the following criteria:
a) Account activation by email means the user receives an email and needs to confirm the activation.
b) Manual account activation means that a system administrator needs to manually activate the newly registered user.
c) Automatic account activation means that a newly registered user will automatically be active.
Note: By default, self-registration is only applied to internal users (logging in with username and password). If you have an identity provider such as LDAP, SAML or OpenID Connect, use the respective settings in their configuration to control which users are applicable for automatic user creation.
Define if the email address should be used as login name.
Define after how many days the activation email sent to new users will expire. Afterwards, you will have the possibility to re-send the activation email via the user settings.

Define a registration footer for registration emails
You can define a footer for your registration emails under -> Administration -> Authentication -> Settings.
- Choose for which language you want to define the registration footer.
- Enter a text for the registration footer.

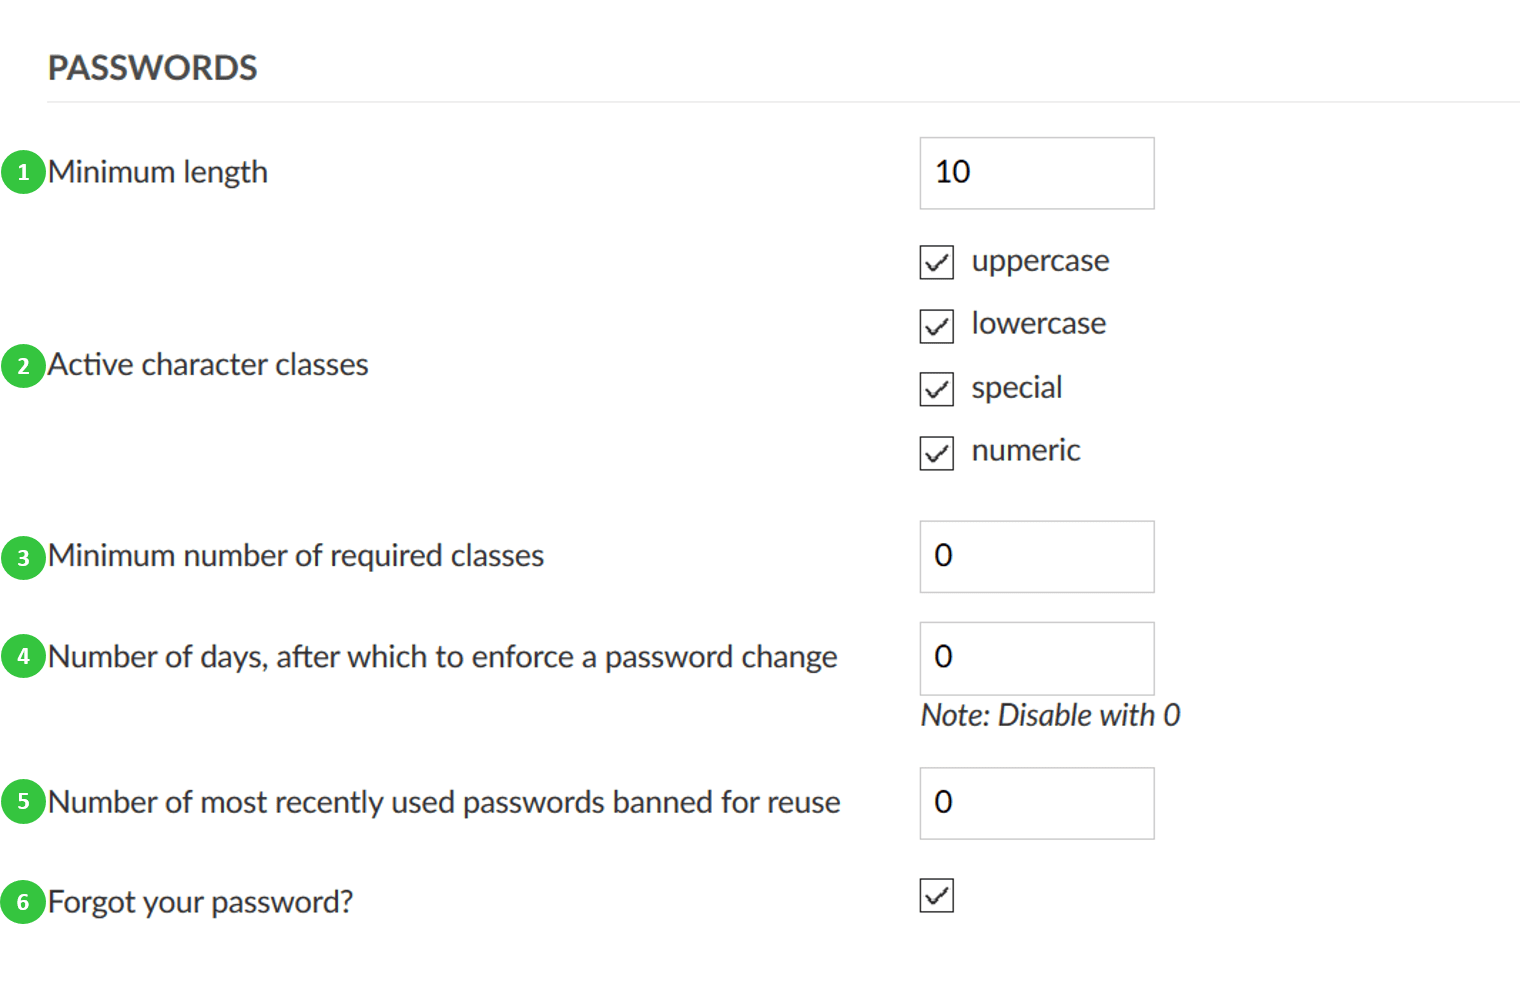
Configure password settings
You can change various settings to configure password preferences in Nepenthes.
- Define the minimum password length.
- Define the password strength and select what character classes are a mandatory part of the password.
- Define the minimum number of required character classes.
- Define the number of days, after which a password change should be enforced.
- Define the number of the most recently used passwords that a user should not be allowed to reuse.
- Activate the Forgot your password. This way a user will be able to reset the own password via email.

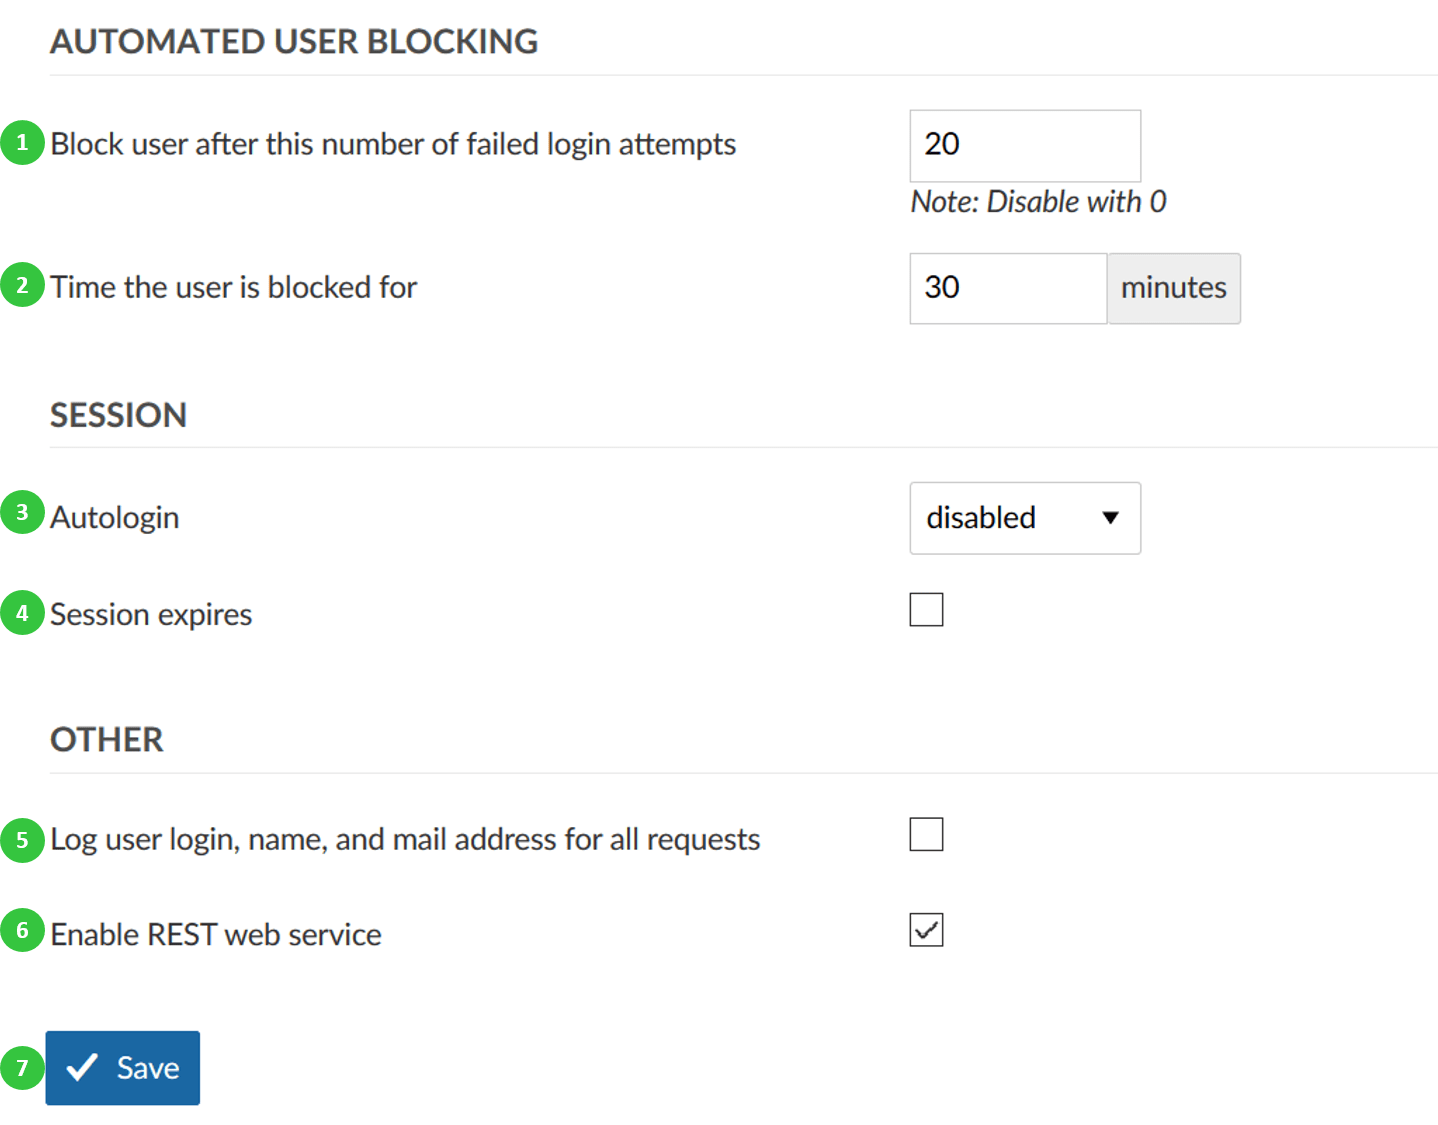
Other authentication settings
There can be defined a number of other authentication settings.
- Define the number of failed login attempts, after which a user will be temporarily blocked.
- Define the duration of the time, for which the user will be blocked after failed login attempts.
- Enable or disable the autologin option. This allows a user to remain logged in, even if he/she leaves the site. If this option is activated, the “Stay signed in” option will appear on the login screen to be selected.
- Activate the session expiration option. If you select this option, an additional field will open, where you will be able to define the inactivity time duration before the session expiry.
- Define to log user login, name, and mail address for all requests.
- Enable REST web service. This setting allows users to access the Nepenthes API using an API token created from the users "My account" page.
- Do not forget to save your changes.
