Excel synchronization with Nepenthes
Video tutorials
Download and upload
See how to set up the synchronization between Nepenthes work packages and MS Excel.
Synchronize custom queries (views)
See how to synchronize custom work package queries from Nepenthes in MS Excel.
Synchronize hierarchies
See how to synchronize work package hierarchies in Nepenthes with MS Excel.
Synchronize relations
The Nepenthes Excel synchronization also supports relations. To update the relations try the following steps:
- Open the Excel file.
- Prepare the headline (choose "*Relations" from drop-down).
- Close the file (don't forget to save before).
- Open the file and download the work packages.
You will then get the relations in your Excel file.
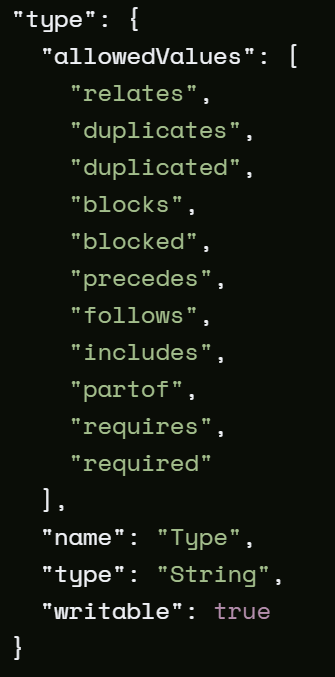
Syntax: {type of relation} {id}, {type of relation} {id}, etc.
Example: "follows 12345, precedes 45678"
Unfortunately, there is no way to create relation with translated terms via API at the moment. You have to use these terms instead: Relation Edit Form API
Step-by-step guide
Setting-up the Excel list
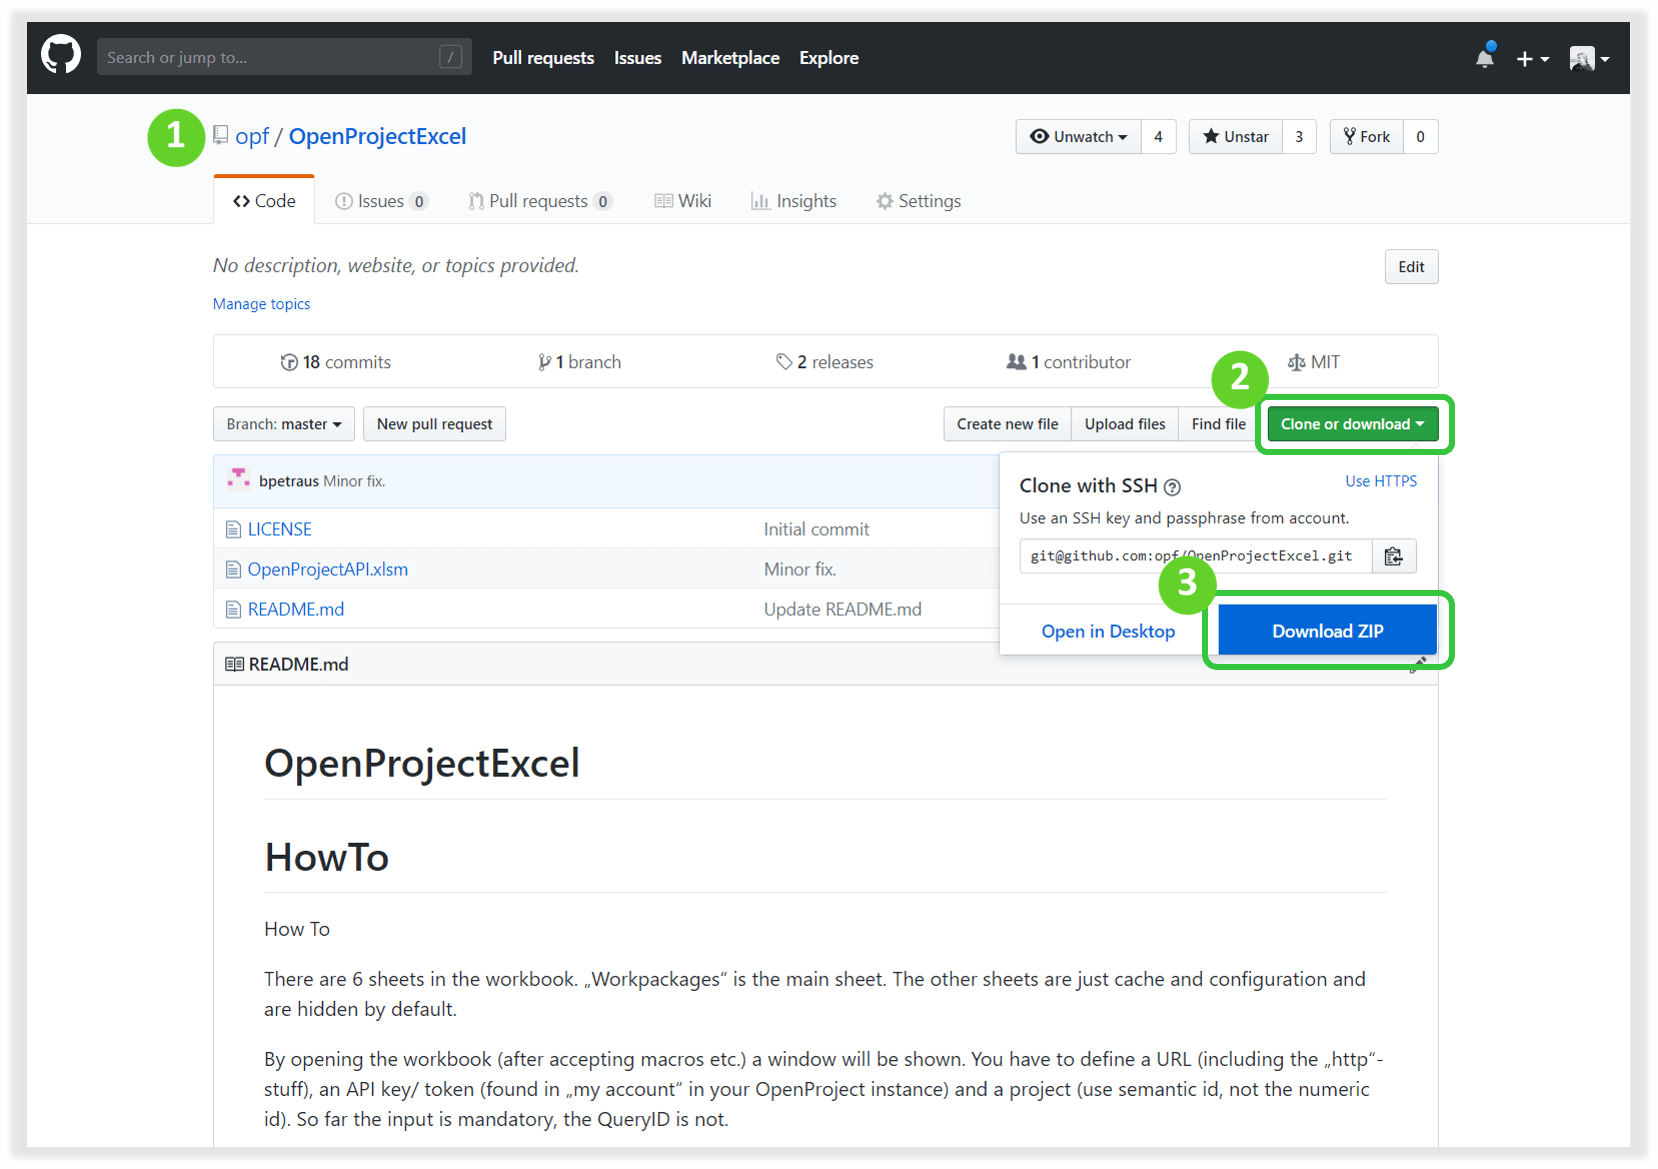
In order to upload your tasks from an existing Excel list to Nepenthes, you need to go to NepenthesExcel on GitHub.
Click on the green Clone or download button.
Choose the option Download ZIP.
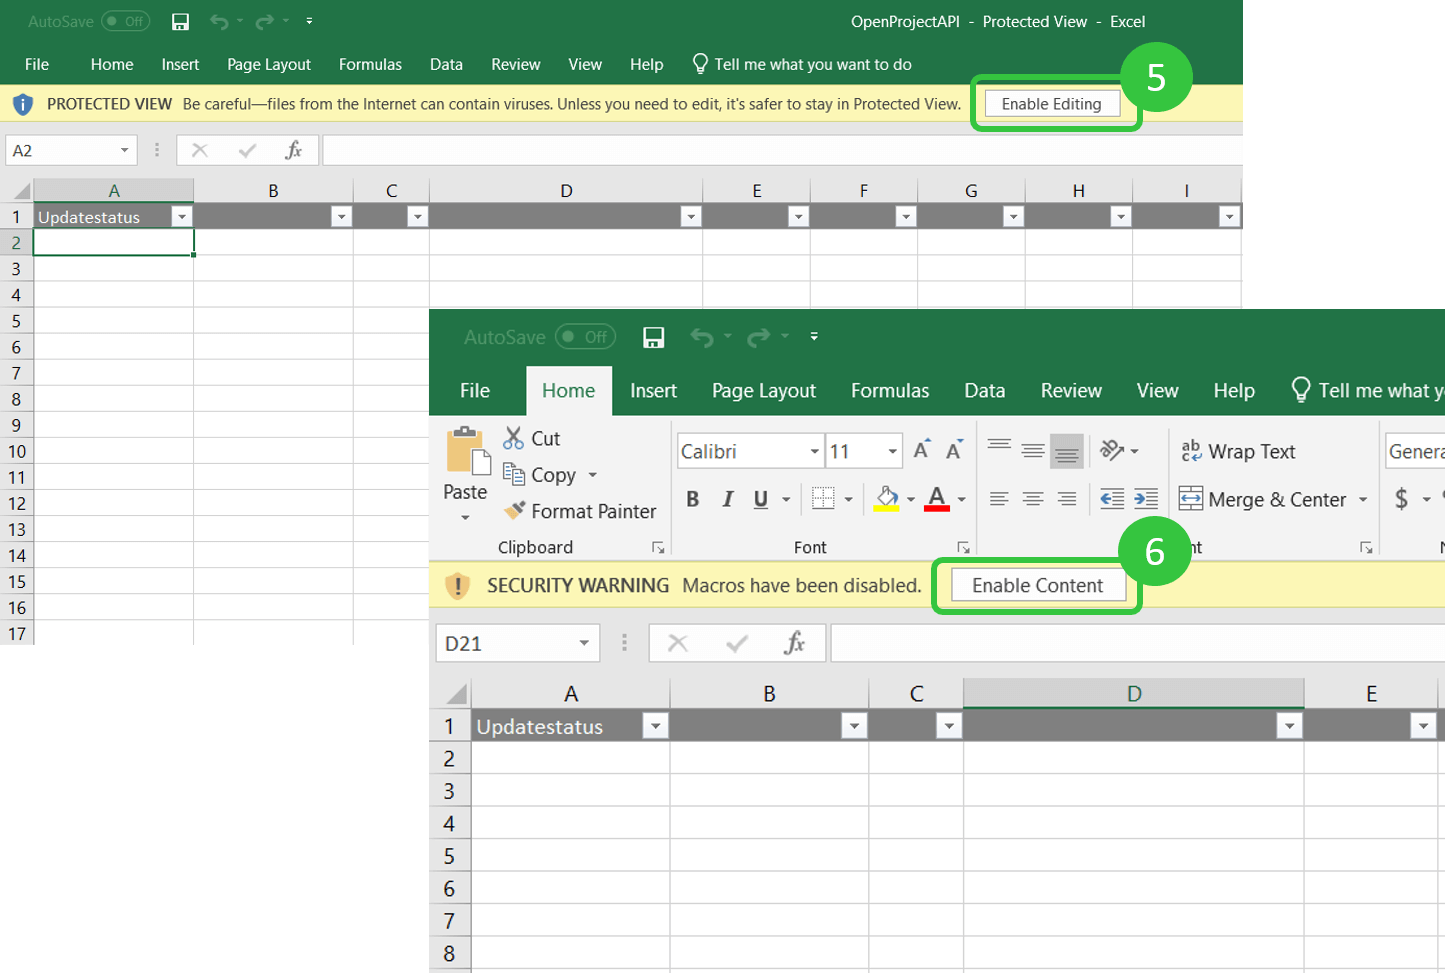
Then, you need to extract the ZIP file and open the NepenthesAPI Excel document.

Next, within the Excel document you are asked to Enable Editing.
Enable Content to activate macros within your document.
- Enter settings (URL and API-Token) and choose a project (and optional a work package query) which you want to synchronize your data with.
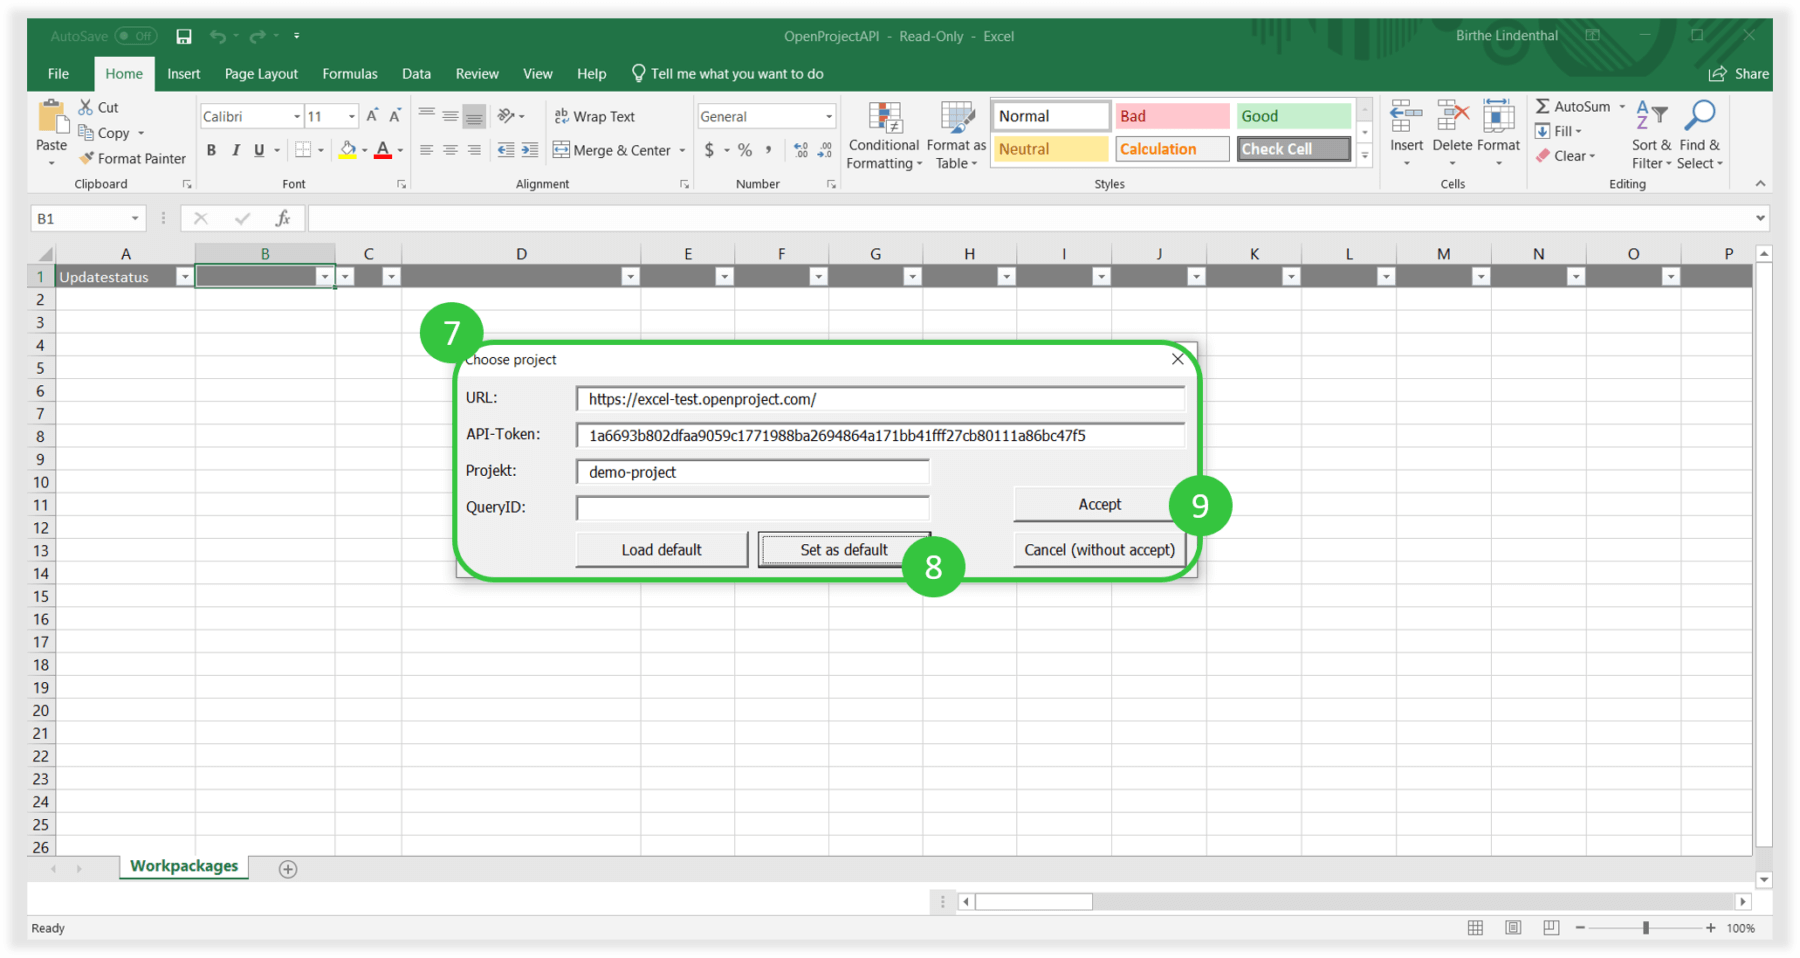
URL: the URL of your Nepenthes instance. API-Token: can be generated within your Nepenthes installation ->My Account -> Access token. Generate a new API token and copy & paste it to this form. Project: this is the project identifier which can be found within the project you want to synchronize -> Project settings -> Information. It is also shown in the URL if you open a project. Query ID (this field is optional): enter the ID of a work package query within a project with that you want to synchronize your Excel list.
Set as default: enable to remember the settings as default.
Accept to start the synchronization.
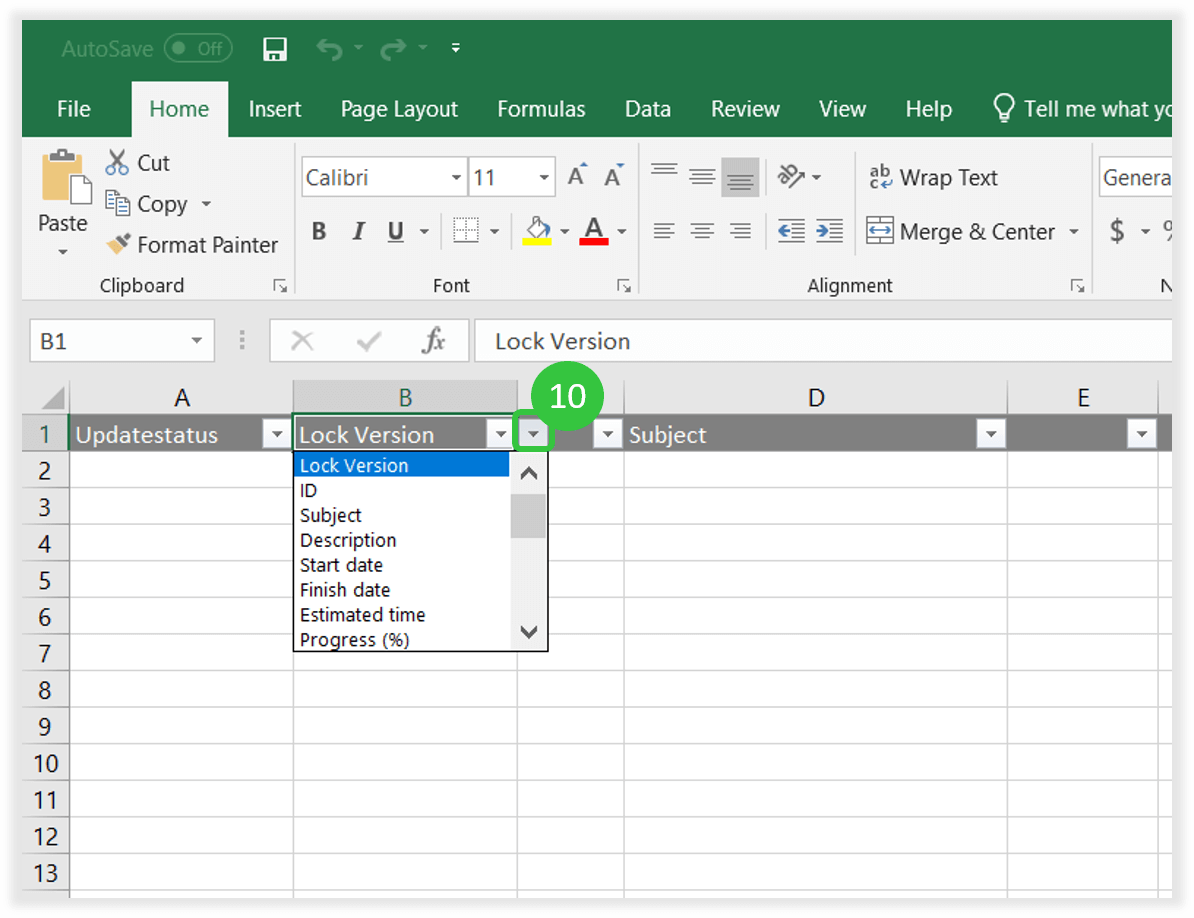
You need to select a minimum of columns to start with the synchronization. For column selection, click in the header and open the drop down which opens next to the regular drop down icon: Select the following column headers at a minimum: Update statusLock VersionIDSubject
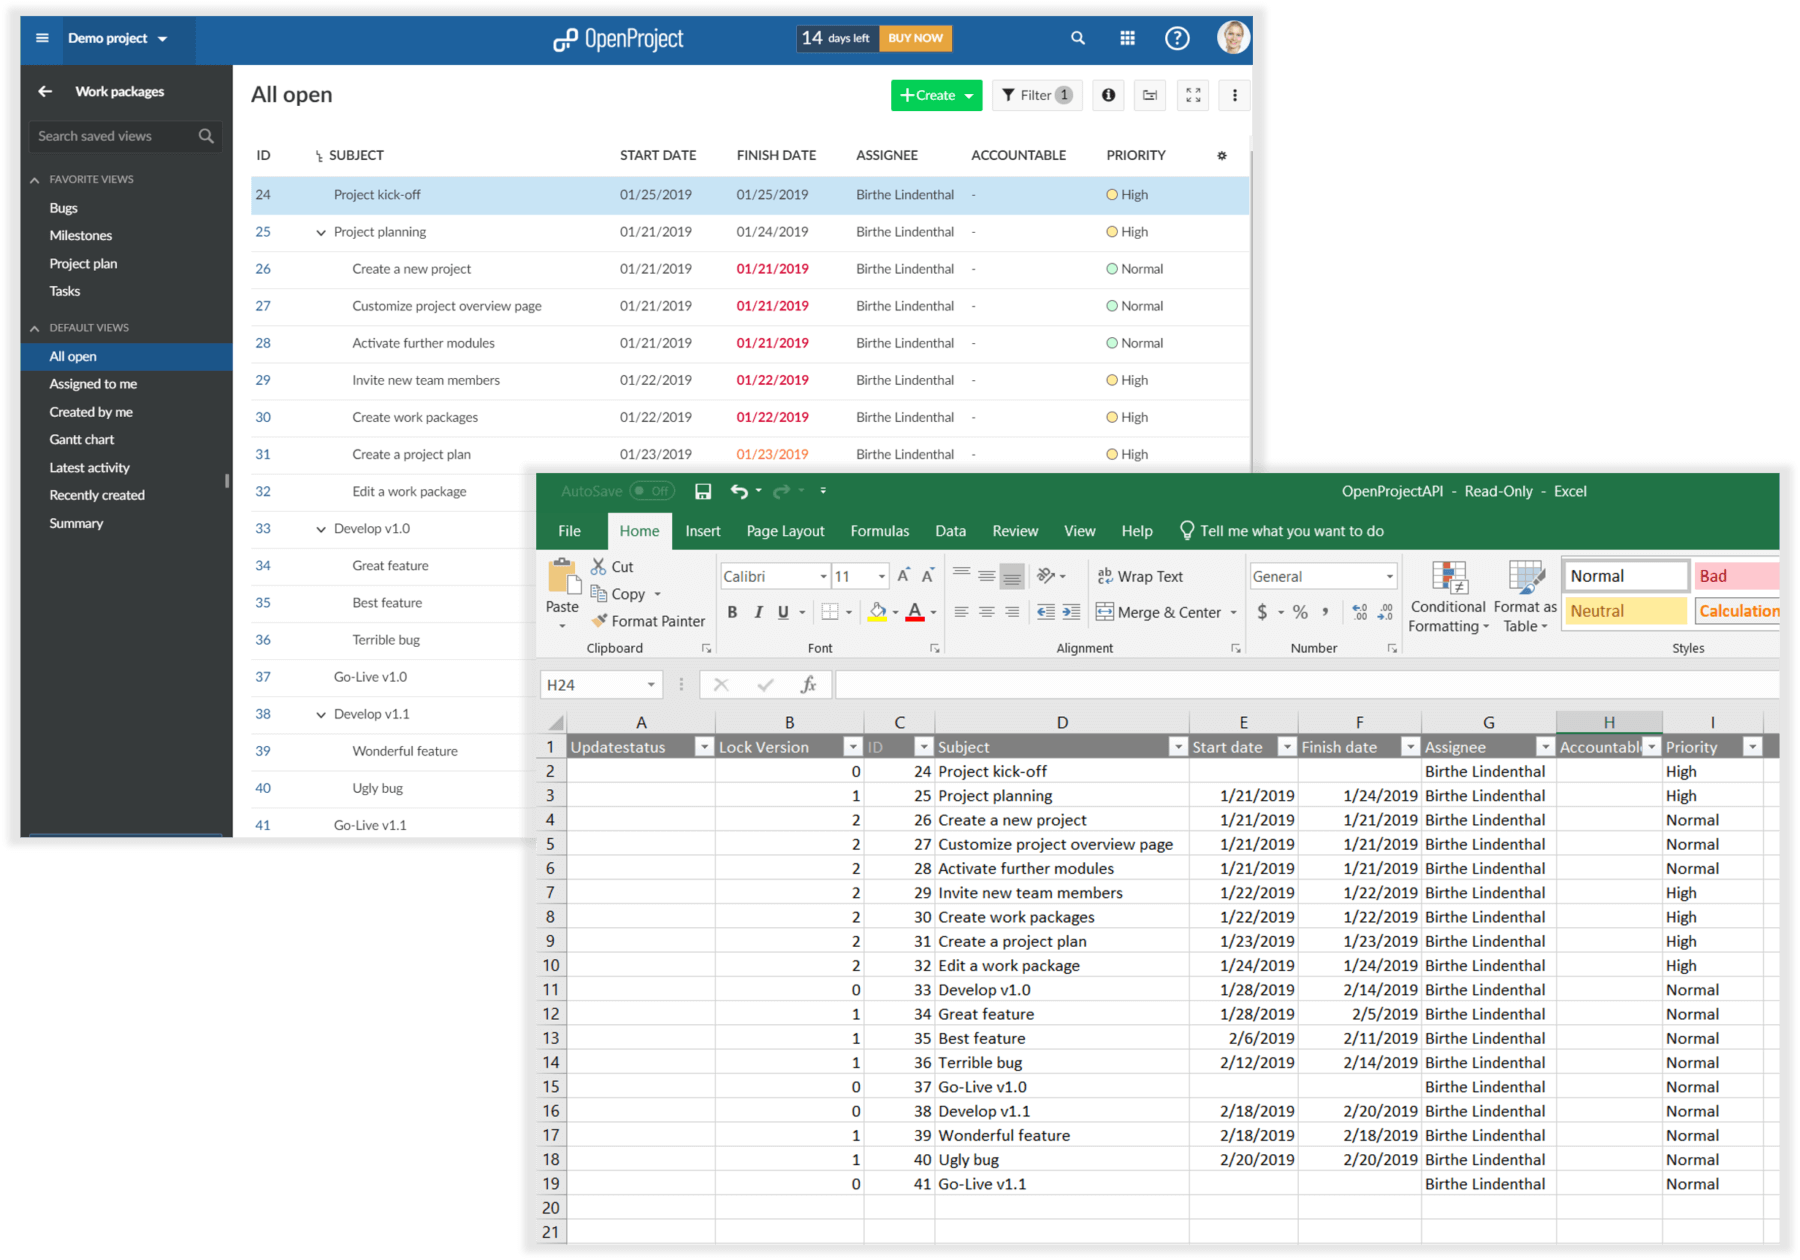
Additionally, you can select as many other columns that should be synchronized – always by clicking in the header and selecting the drop down icon which appears next to the regular icon. You will have all fields available, incl. custom fields.
Important: make sure you have all fields that need to be synchronized from your Excel list also available in Nepenthes. Some might be created beforehand as custom fields in Nepenthes. Attributes that do not exist in the selected project within Nepenthes are NOT available in the headline. They cannot be selected in the header (via the drop-down). Neither can you just create a new column with an attribute that does not exist in Nepenthes. This will generate an error message.
Copy and paste all data accordingly from your existing Excel list to this sheet.
- Important: Ctrl + B will open the synchronization module to choose between the following options:

Download work packages: initially downloads all work packages from the selected project (and query). Upload / update work packages: makes changes to the work packages, e.g. adding new work packages or changing any information. This option needs to be chosen in order to initially import and existing Excel list. Show chosen project: Opens the settings to adapt URL, API key, project or query ID.
Congratulations! You can now synchronize your data between Excel and Nepenthes.
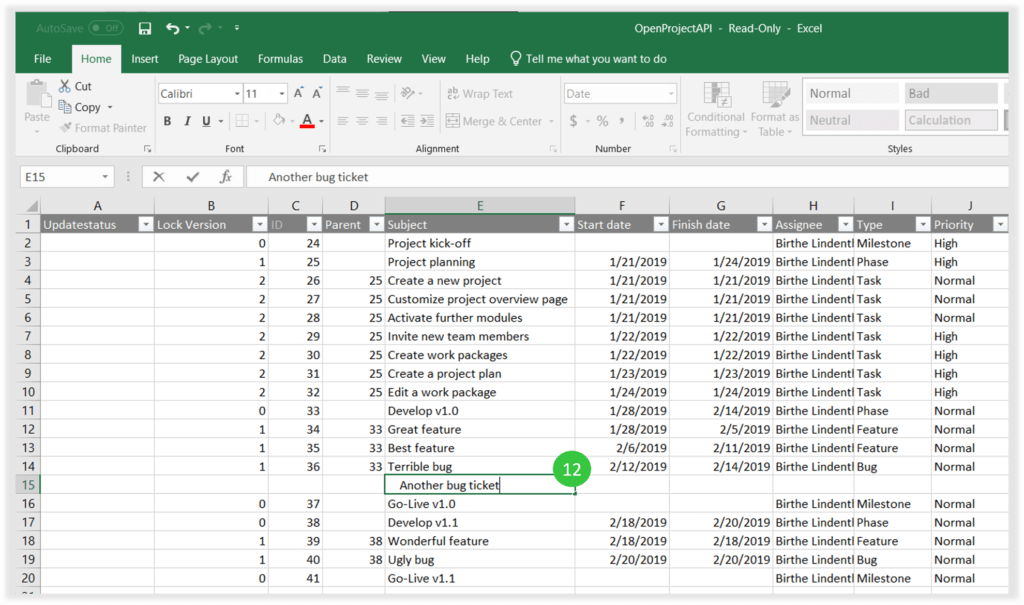
- To synchronize hierarchies (Parent and child relations), insert the column Parent within the header of the Excel Sheet as described above (screen 10).
To add or edit a new parent-child relation, you have two possibilities:
A) You can add a child to a work package when you enter 4 empty spaces (press 4x Space) before typing the subject of the child work package.
Expert tip: it does not have to be empty spaces (default 4 empty spaces) to separate the next hierarchy. You can also take a „-“ and for the next hierarchy „—“. But the disadvantage is that the hyphen will also be displayed in the work package subject. Therefore we recommend the spaces, because they will not appear in Nepenthes.
- Pressing Ctrl + B and selecting Upload / update work packages will open a window to define a new character for setting a parent-child-relationship (default is 4 empty spaces).
Click OK when the screen for the Search characters (screen 13) appears. The IDs in the Parent column will then be automatically updated.
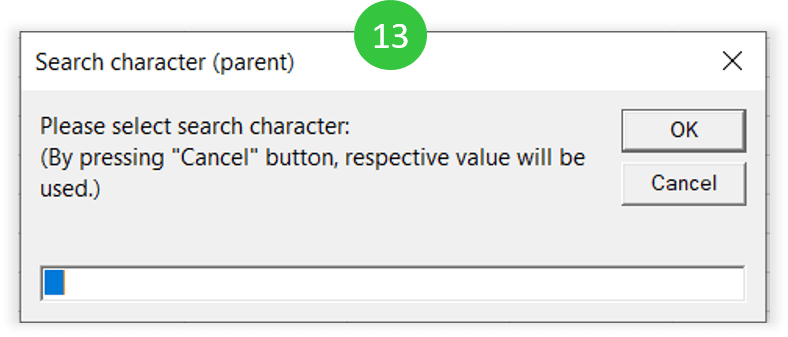
Pressing Cancel will ignore the Hierarchy – no matter what has been inserted. This is relevant for option B:
B) you can edit the IDs in the parent column manually. If you have edited the IDs manually in the parent column, just click Cancel when the above Search character option (screen 13) appears. Then, the hierarchy will be updated according to the IDs in the column Parent.
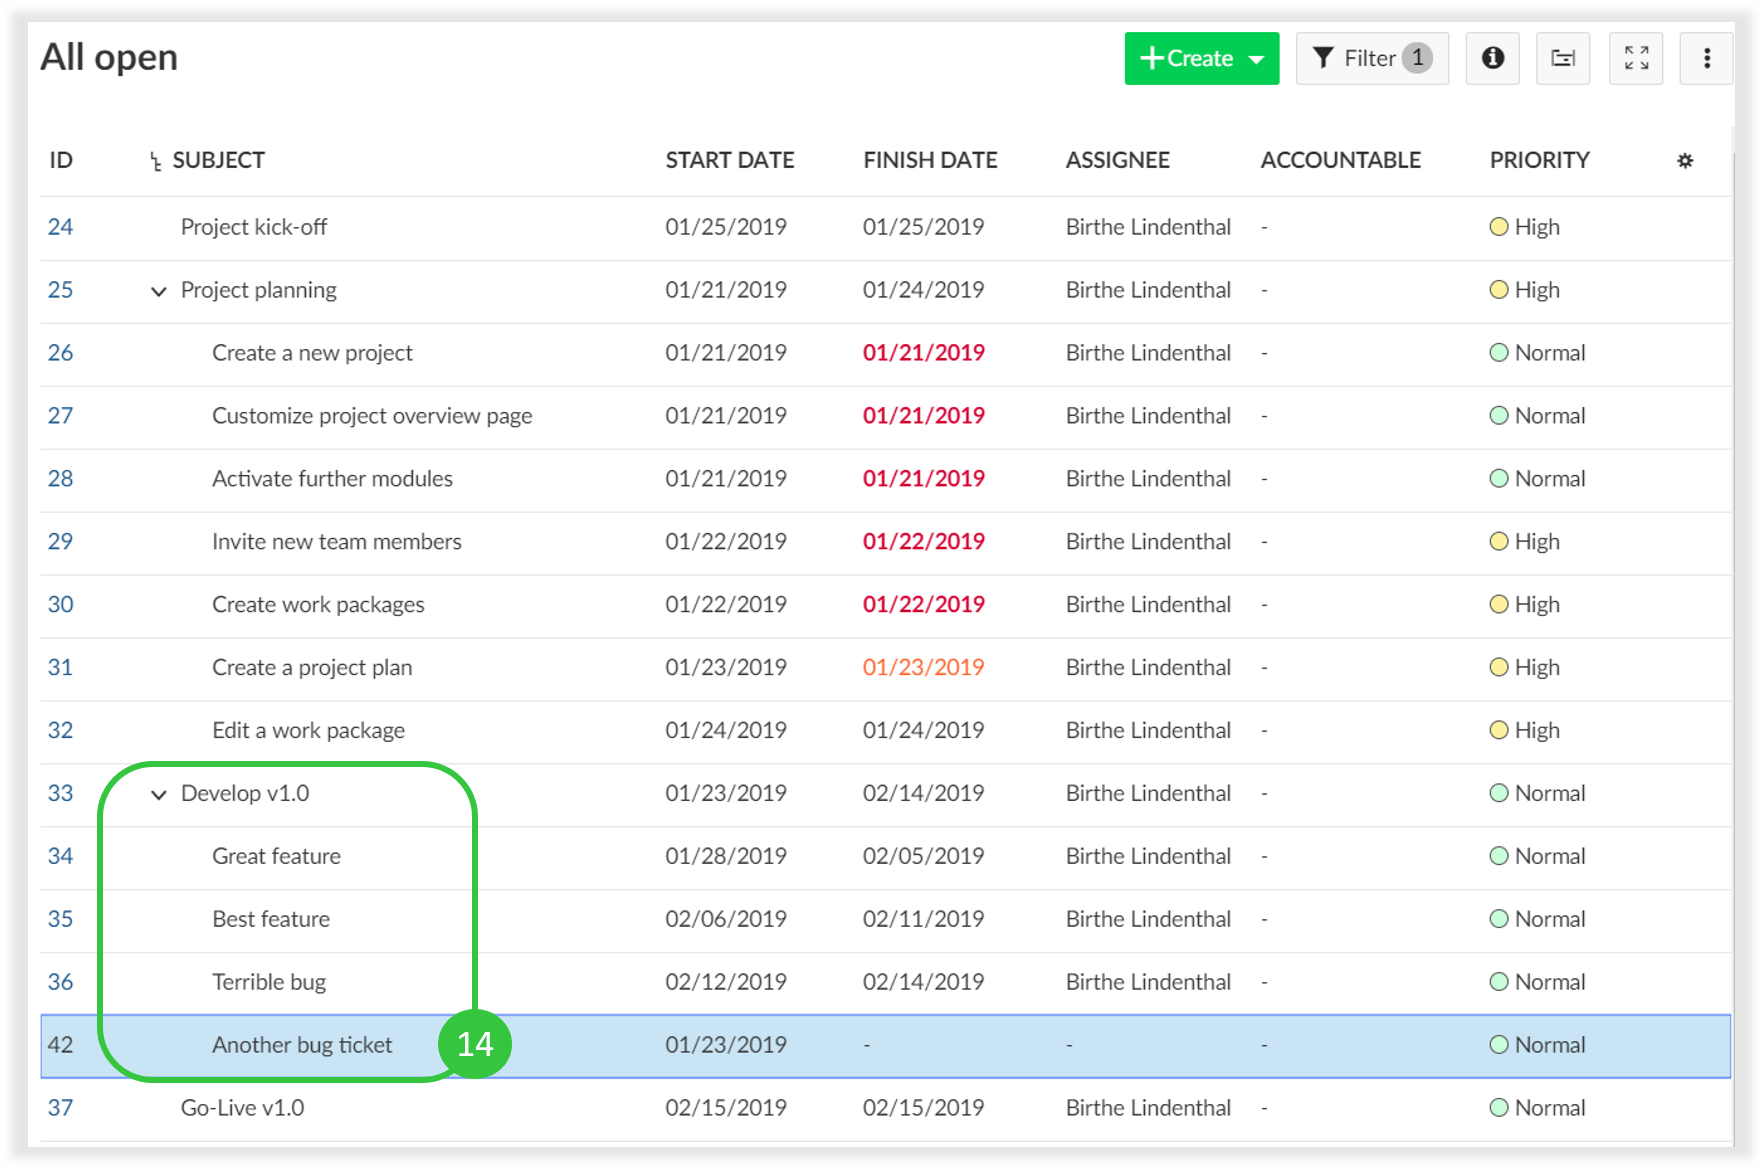
- The parent-child-relation will be displayed in Nepenthes.
Hopefully, this will save you lots of time to import all your old Excel To-Do lists and get started with Nepenthes for project management.